
Get a free website audit with clear, actionable recommendations, delivered within 48 hours. - Get Your Website Audit
Introduction — Why Use Webflow and Shopify Together?
If you've ever tried building a stunning marketing website inside Shopify, you already know the frustration. Shopify is an incredible e-commerce platform, but when it comes to designing flexible, conversion-optimized marketing pages, it has real limitations.
Webflow, on the other hand, is a designer's dream — pixel-perfect layouts, animation, CMS-powered pages, and no-code freedom. But Webflow isn't built for running a full store with cart management, checkout, and inventory out of the box.
So what if you could get the best of both?
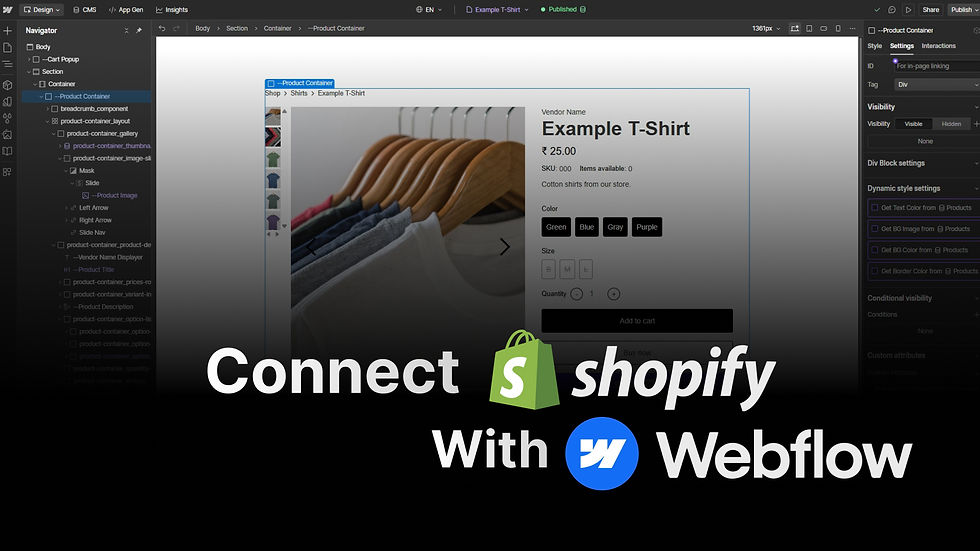
That's exactly what Shopyflow makes possible. Shopyflow is a third-party app that acts as a bridge between your Shopify store and your Webflow website. It syncs your Shopify products directly into Webflow's CMS, and adds fully functional cart and buy modules to your Webflow pages — so your customers shop on your beautiful Webflow site while Shopify handles all the commerce in the background.
I recently used Shopyflow to build and launch a client's store in just two to three days. In this guide, I'll walk you through the exact process, step by step.
This guide is for:
Webflow designers and developers
Shopify store owners who want a better marketing website
Agencies building headless e-commerce setups for clients
What Is Shopyflow?
Shopyflow (shopyflow.com) is an app that connects your Shopify store to your Webflow project. It works by:
Installing a Shopify app on your store
Installing a companion app inside your Webflow project
Syncing your products, variants, collections, and tags into Webflow CMS automatically
Providing ready-made components (cart module, buy module, product listing module) that you paste directly into your Webflow designer
Free vs. Paid: Shopyflow's free plan works fine for building and testing on a Webflow .webflow.io subdomain. To accept real payments, connect a custom domain, and unlock premium features, you'll need to upgrade to a paid plan.
Prerequisites — What You Need Before Starting
Before diving in, make sure you have:
An active Shopify store with at least one published product
A Webflow project (free plan is fine to start)
A Shopyflow account — sign up at shopyflow.com
Step 1 — Install the Shopyflow App in Shopify
The first thing you need to do is install the Shopyflow app from within your Shopyflow dashboard.
Log in to your Shopyflow account at app.shopyflow.com
In the onboarding dashboard, click "Install Shopify App"
You'll be directed to the Shopify App Store — find Shopyflow and click Install
Once installed, log in with your Shopyflow account credentials inside the Shopify app

After installation, the app will appear inside your Shopify admin. You'll see a summary screen with the next steps to complete.
Step 2 — Connect Shopyflow to Your Webflow Project
With the Shopify side set up, it's time to link your Webflow project.
Inside the Shopyflow dashboard, navigate to Stores and find your connected Shopify store
Click "Connect to Webflow"
Select your Webflow project from the list (or add a new one)
Authorize the connection — this gives Shopyflow permission to read and write to your Webflow CMS
Save the connection
Next, install the Shopyflow app inside Webflow itself:
Open your Webflow project in the Designer
Go to the Apps panel (the puzzle piece icon)
Search for Shopyflow and connect it
Sign in with your Shopyflow account
Enable Auto Install when prompted — this automatically injects the required Shopyflow script into your site's custom code

Publish your Webflow site to at least one domain (even the .webflow.io subdomain) — this is required before CMS sync will work
To verify the script was injected correctly, go to your Webflow Site Settings → Custom Code tab. You should see a Shopyflow script listed under "Apps Code." If it's there, you're good to go.
Step 3 — Sync Shopify Products to Webflow CMS
This is where the magic happens. Shopyflow will automatically create all the CMS collections you need and populate them with your Shopify data.
Inside the Shopyflow dashboard, go to the CMS Sync section
Click "Import Shopify Data" — Shopyflow will automatically create the following CMS collections in Webflow:
Products
Product Options
Collections
Product Types
Vendors
Tags
Wait for the sync to complete — for a small store with a few products, this takes under a minute

Once done, open your Webflow CMS and check the Products collection. Each product from Shopify will appear as a CMS item with fields like:
Product title and slug
Product price and compare price
Main image and gallery images
Product type, vendor, and tags
Variants and product options

Important note: If a product is set to Draft in Shopify, it will also be synced as a draft in Webflow — it won't appear on your live site until you publish it.
Step 4 — Set Up the CMS Product Page (Cart Module + Buy Module)
Now that your products are in the CMS, it's time to build your product detail page. This involves adding two key components from the Shopyflow Store Builder: the Cart Module and the Buy Module.
Add the Cart Module
The cart module handles the shopping cart UI. It needs to be present on every page where products appear.
In the Webflow Designer, navigate to your CMS Product Template page (under Pages → CMS Pages)
Open the Shopyflow app in the Apps panel and click "Launch Store Builder"
In Store Builder, click Add New → Cart Module
Choose "With Popup" layout and click Copy Element
Paste the cart module anywhere on the page (inside a section or container is fine)

After pasting, open the Navigator panel and find the Cart Popup element. Select it and remove the class sf-cart-open from the element. This hides the cart by default — it will appear when triggered by an add-to-cart action.
Add the Buy Module
The buy module is what your customers use to select variants and add the product to their cart.
Back in Store Builder, click Add New → Buy Module
Select CMS as the source from the dropdown
Click Copy Element and paste it onto your product page
Now connect the buy module fields to your CMS:
Product title → connect to Product Title field
Product price → connect to Product Price field
Product description → connect to Product Description (or Meta Description)
Main image → connect to Product Main Image
Gallery images → connect to Product Gallery Images

Connect Product Options (Color, Size, etc.)
This part is slightly more involved but straightforward once you know the pattern:
Find the Product Options list inside the buy module
Set the CMS source to the Product Options collection
For each option item, connect:
Display Name → Product Option Display Name
Value → Product Option Display Name (yes, same field for value)
For the option label (e.g., "Color" or "Size"), connect to Product Option Name

The Most Important Step — Connect Product ID
This is the step most people miss, and it causes the cart to break silently.
Select the Product Container element (the outermost wrapper of your buy module)
In the element settings, find SF Product Attributes Value
Connect it to the Product ID field in your Products CMS collection

Once this is connected, publish your site and test. You should be able to click through product variants, see images update, and add items to the cart.
Step 5 — Build the Product Listing Page with Filters
The product listing page is where all your products are displayed, along with filter options. Shopyflow provides a ready-made Product Listing Module that handles this.
Go to your homepage or create a new Collection page
Add a Section → Container to the page
Open Store Builder → Add New → Product Listing Module
Copy and paste it inside your container
Connect the Filter Components
Inside the product listing module, you'll see filter sections for Collections, Product Types, Vendors, and Tags. Connect each one:
Collections filter → connect to Collections CMS collection → Name field
Product Types filter → connect to Product Types CMS collection → Name field
Vendors filter → connect to Vendors CMS collection → Name field
Tags filter → connect to Tags CMS collection → Name field
For each filter menu item, make sure you also set the filter attribute value to the Name field — this is what Shopyflow reads when a customer selects a filter.

Add the Product List Item
Inside the listing container, you need to add the individual product card:
Open Store Builder → Add New → Product List Item
Copy and paste it inside the product listing container
Connect the product card fields:
Product image → set as background image → Product Main Image
Vendor name → Vendor Name (optional)
Product title → Product Title
Price → Product Price
Compare price → Product Compare Price
Set the current product context on both the image container and the add-to-cart button by pointing them to Current Product.

Don't Forget the Cart Module
Add the Cart Module (same as Step 4) to this page as well. The cart module must be present on every page that displays products — if it's missing, add-to-cart functionality will not work correctly.
Connect Product ID on the Listing Page Too
Just like the product detail page, select the Product Container inside the list item and connect SF Product Attributes Value to the Product ID field in your Products CMS. This is easy to forget when building the listing page separately.
Step 6 — Launch Checklist Before Going Live
Before you point your custom domain and start taking orders, work through this checklist:
1. Subscribe to a Shopyflow plan The free plan only works on the .webflow.io subdomain. To accept real payments, upgrade to a monthly or annual Shopyflow plan.
2. Install the Shopify Headless App and get your storefront token Search for "Headless" in the Shopify App Store, install it, and copy the Storefront API token. You'll paste this into your Shopyflow settings.
3. Set your Shopify and referral domains In Shopyflow settings, add your domains. A clean setup looks like:
Main site: yourstore.com (Webflow)
Shopify store: shop.yourstore.com or checkout.yourstore.com
This keeps things organized and avoids confusion for customers.
4. Customize your Shopify checkout Go to Shopify Settings → Checkout to add your logo, brand colors, and any custom scripts for login/signup redirects. If you want customers to be redirected back to your Webflow site after checkout, add the redirect URL script provided in the Shopyflow docs.
5. Hide your Shopify store from search engines This is critical for SEO. If you don't do this, Google will index both your Webflow site and your Shopify storefront — creating duplicate content that hurts your rankings.
Go to Shopify Admin → Online Store → Preferences and check the box to block search engines from crawling your Shopify store.
6. Configure out-of-stock behavior In Shopyflow settings, configure how your product pages handle out-of-stock variants — for example, disabling the add-to-cart button or showing an "Out of Stock" label when a variant is unavailable.

Optional — Customer Account Pages
If you want to give customers a fully Webflow-hosted experience (login, order history, saved addresses), Shopyflow provides pre-built account page components you can add to dedicated Webflow pages.
However, if you're running a lean store with a small product catalog, you don't necessarily need this. You can simply link customers to their Shopify account portal directly — it's less work and perfectly functional.
Common Mistakes and How to Fix Them
Products show but add-to-cart doesn't work You've likely missed connecting SF Product Attributes Value to the Product ID field on the Product Container element. This applies to both the product detail page and the listing page.
Cart popup never appears Make sure you've added the Cart Module to the page and that you've removed the sf-cart-open class from the Cart Popup element.
CMS sync isn't working Ensure your Webflow site is published before running the import. Shopyflow requires a live published URL to establish the CMS connection.
Third product option is showing blank If you have products with only two option types (e.g., Color and Size), the third option container will appear empty. Use Webflow's Conditional Visibility to hide it: set a condition that hides the element when Option Three Name is not set.
Products not appearing on listing page Check that the Cart Module is present on the page, and that the Product Container inside your list item has SF Product Attributes Value connected to Product ID.
Frequently Asked Questions
Does Shopyflow work on the Webflow free plan? Yes — you can build and test your entire store on a .webflow.io subdomain using Shopyflow's free plan. You only need to upgrade when you're ready to publish on a custom domain and accept real payments.
Is Shopyflow free? Shopyflow has a free tier for development and testing. A paid subscription is required to go live with a custom domain, enable checkout, and access premium features.
Will my Shopify products automatically update in Webflow? Yes. Shopyflow keeps your Webflow CMS in sync with Shopify. When you update a product in Shopify (price, description, images), those changes are reflected in Webflow automatically.
Can draft products in Shopify show in Webflow? Yes — draft products are synced to Webflow, but they are also set as drafts in the Webflow CMS. They will not appear on your live site until published.
Do I need to know how to code? No. The entire setup in this guide is done through Webflow's visual designer and the Shopyflow dashboard — no code required.
Conclusion
Connecting Shopify to Webflow using Shopyflow gives you the best of both platforms: Webflow's world-class design flexibility paired with Shopify's rock-solid commerce infrastructure.
The process comes down to six key steps: install the apps on both sides, sync your CMS, add the cart and buy modules to your product page, build your listing page with filters, and follow the launch checklist before going live.
The most common point of confusion — connecting SF Product Attributes Value to the Product ID field — is easy once you know to look for it. Miss it, and the cart breaks silently. Get it right, and everything works smoothly.
If you want to see the full build in action, watch the complete video walkthrough on my YouTube channel (link in description). And if you need help setting this up for your own store or a client project, feel free to reach out — my contact details are in the description below.
Ready to bulid a website that actually drives results?
Or email us at ashok@tweakdesigns.in - we respond within one business day.
How to Connect Shopify to Webflow Using Shopyflow (Step-by-Step 2026 Guide)
Learn how to build a Shopify + Webflow e-commerce store using the Shopyflow app. This step-by-step guide covers CMS sync, product listings, cart modules, and launch checklist — with zero coding required.

Ashokkumar Chavada
Web Design
Dec 19, 2025
.jpg)